
Recently, a friend of mine gave me a bunch of his old clothes because he knows how I feel about fabric. Which was awesome because not only is he right about my fabric obsession, but he wears really cool clothes AND works in wardrobe in the tv/film industry. Do I have awesome friends?? Yes, yes I do.
Something about that big bag of clothes he gave me screamed, "CHALLENGE!" I felt this immediate urge to have my very own personal mini-Project Runway and see how many cool ways I could transform this big bag of hand-me-downs into cool "new" threads.
Of course, I forgot to take before and after pictures ... I really need to work on that. The good news is, I have similar pieces to the ones I transformed for compare and contrast purposes.
Here is one of the shirts that he gave me. I love this one too much to cut up. It looks super cute (when pressed) with leggings and a black belt around the center (he only wears size M, so it's not huge). The perfect "boyfriend" style shirt. There was another shirt exactly like this, but in a light blue. It was slightly larger and a bit more baggy than this one below. It became my first victim. I had so much fun with this!

Both shirts had a cool inside lining that was bound to the outer fabric. It was great to have the option to use both the inside and outside of the shirt for a different fabric print.

Here is the outcome of the shirt (just like the one above) in blue that I transformed into a dress:
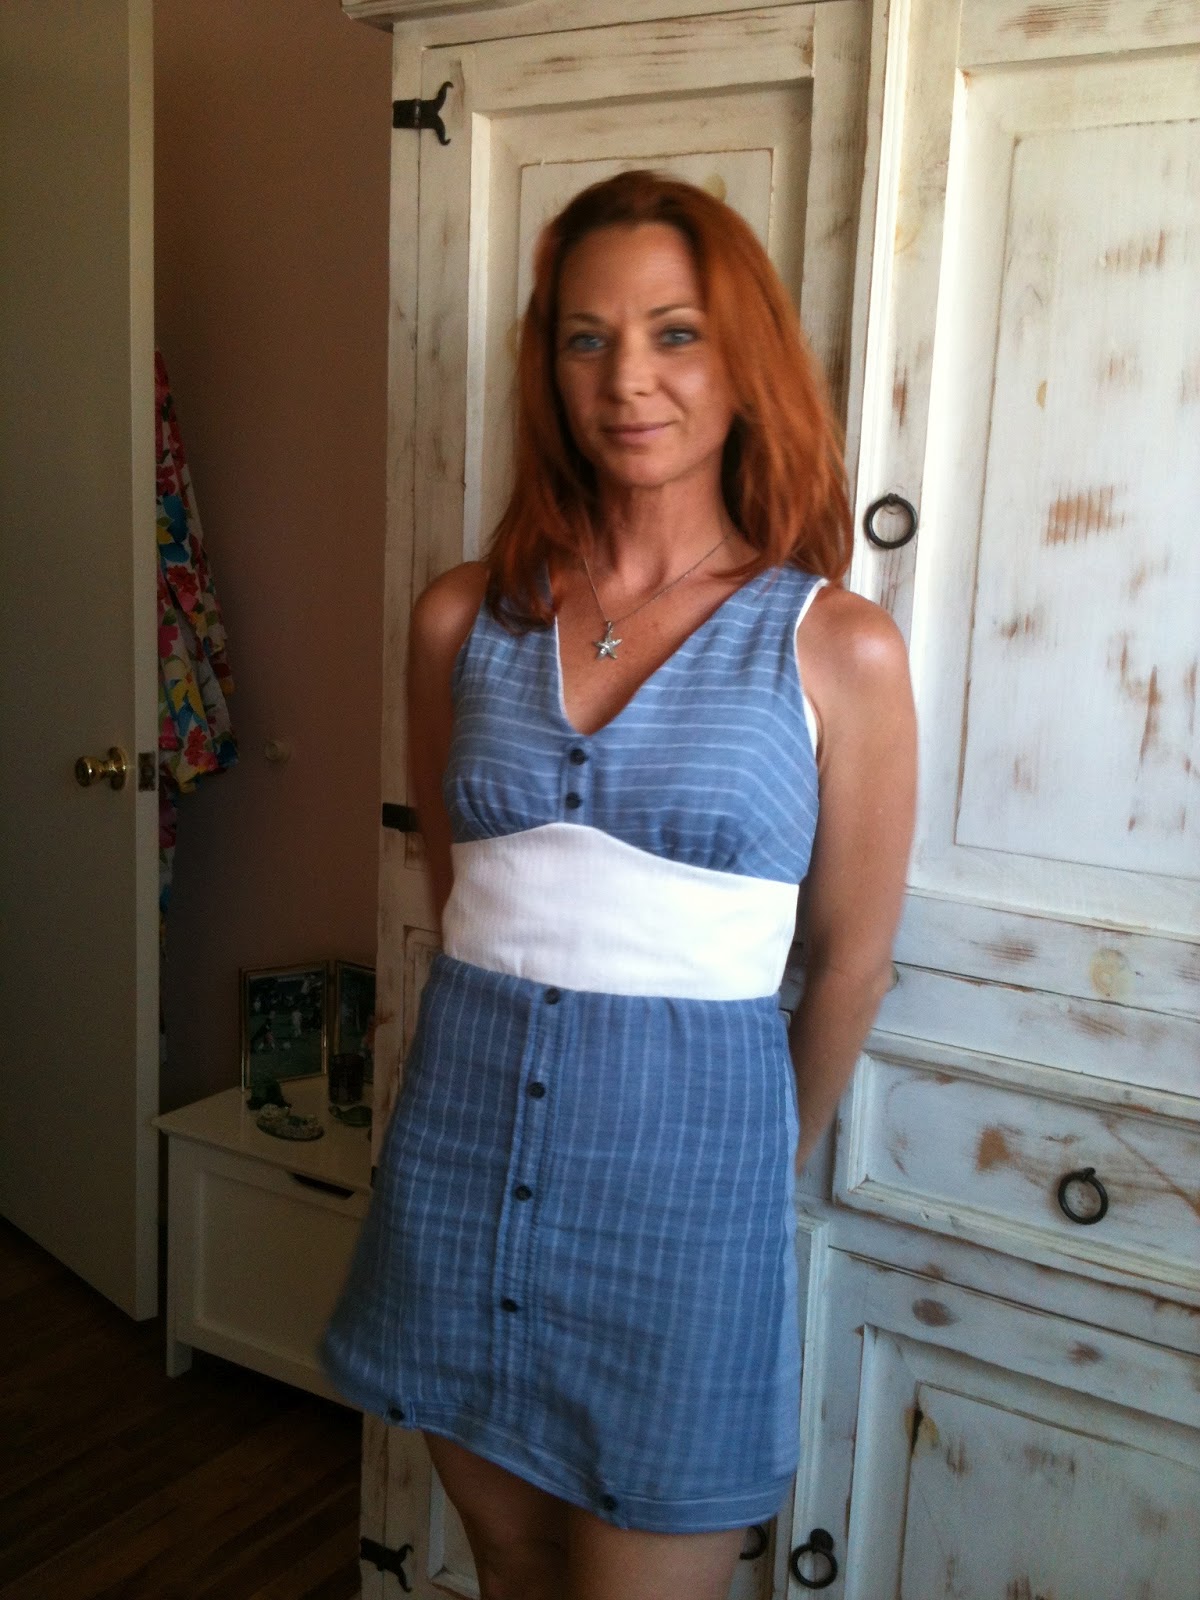
I used some organic hemp cotton I had on hand for the lining. The midriff I used a ribbed cotton I found on the remnant rack at Joann.

I had an issue with the back that was mostly poor planning. If I would have thought ahead, I would have cut a seam down the entire back of the skirt, so it wouldn't bend the fabric at the base of the zipper. I was hoping I could stop the zipper at the end of the midriff panel, but I could not wiggle into it for the life of me! I had already sewn on the hem, so I didn't want to undo it. This fabric didn't take well to mistakes or seam ripping. It's not bad to keep me from wearing it, though.

Side view.
I love the little panel using the reverse side of the fabric. It happened by mistake. When I cut the shirt into a skirt I cut it too narrow on the sides and it needed more flare at the hips, so I added these little triangles. I like the extra touch it adds.

Front skirt -
I sewed shut the buttons on the front of the skirt. The hem I had to patch together to make it long enough to wrap around the entire base. There was a seam in the front on the hem that bothered me, so I added placket pieces from the cuff to cover the hem and matched it on the other side.


I used another placket piece in the center of the bust.

A little of the reverse side of the fabric to cover the seams on top of the sleeves/shoulder seam.

Another piece of reverse fabric to cover the zipper mess.

This is the pattern I used for the bodice. I extended the midriff panel a bit and kinda winged the bottom skirt. This is an excellent pattern to work with.

After I tackled that project, I moved on to some other fun re-creations with my bag of clothes. First, I attempted something I have never tried before ... altering a pair of jeans at the waist. This was not easy, so don't ever ask me to alter jeans of you ... lol. I am so excited I can do it for myself, though, because I have a jean skirt I love and am too small for now, but I just can't let it go. Now I may be able to salvage it and maybe even wear it without a belt! My buddy gave me a couple pairs of jeans, so I figured I'd experiment with them first. I don't have picture of the exact jeans before I altered them, but they were very similar in size to the jeans below.
Before

After

These jeans were super baggy in the crotch and behind before and they had the same amount of extra inches at the waste as the jeans above. Once I took in the sides, it brought the entire jean up to a perfect fit around the waist and in the crotch. Here is the tutorial I followed to alter these jeans:
There were a bunch of t-shirts in the big bag of clothes, as well. The striped shirt in the photo above I fell in love with instantly. It was a t-shirt just the same size and style as this one below:

I took a tank top I already had and laid it onto the t-shirt and cut around it, trying to keep the pocket in a good position. I wanted to give it a cool band around the edges, so I took one of my son's old red t-shirts he no longer wears and cut it into strips, folded them, and basted them into strips. I pined the strips to the right side of the shirt around the collar and arm holes and sewed them on. Pressed them to the back and top stitched the seams in place. I love how this came out!

As an easy project I cut the bottom of a t-shirt like the grey one above and turned it into a skirt. Perfect for an easy beach cover up.

I have a couple more mini-Project Runway projects coming out of that bag. I'm working on a cool jersey skirt made from a Vans shirt. I still haven't decided what I am going to do with that other pair of jeans ....
.... I'm thinking something crazy! We will see.
And if that isn't enough ... I finally got around to taking photos of the two new messenger bags I have for sale. You can learn more about these bags or purchase this one here:


This bag you can read more about or purchase here:


I have a diaper bag in this same fabric all cut up and ready to be sewn together. It's a new pattern I have not worked with yet, but I can tell it is going to be very cute!
Now if I could just stop getting carried away with my mini-Project Runway challenge ... I might actually get some "work" done.
I'll be back to share my next batch of re-creations soon. Thanks of looking! :)